This post contains affiliate links please see the Disclosure and Privacy Policy page for full disclosures here.
Using an alphabet sensory bin is one of the simplest to expose your child to the alphabet and letter sounds. There is very little set up and it can be easily adapted to your child. And now I have taken all the work out of it for you to make it as easy as possible!
What is an Alphabet Sensory Bin?
An alphabet sensory bin is just a small sensory bin set up for your little one to learn about the alphabet! There are either toys or pictures hidden inside a sensory bin that is filled with anything that you want. Some easy ideas to fill the bin with are: rice, beans, corn, water beads, cotton balls, Easter grass. You will can use anything. Check out my great article on the Homeschool Review Crew blog about Sensory Bins here. For an alphabet sensory bin, I recommend not using water or anything liquid as they can mess up the items hidden.
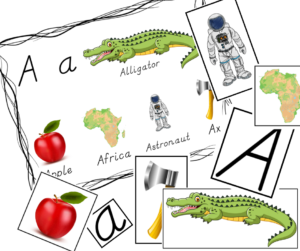
Seems simple right? Well when my oldest was little, I had a hard time finding a sensory bin that was ready to go for each letter. All of the blogs had some great ideas, but I had to go buy toys or find things around my house to put in it. So I just created some simple picture cards for her to find in the bin. I am now bringing that set to you so that you can just print and go!! Well you may want to laminate first. There is even a mat with the same pictures and letters for your little one to match up what they find. Below you will find the letter A cards and mat as a sample.
How to set it all up?
First thing, print out the alphabet sensory bin mats and cut outs found below! Each letter is on a separate page to make it easier. There are 26 mats and 26 pages of cut outs. The cut outs are also on a page per letter to make it easier to cut out. They are the same size as the mats so that your child can easily match and cover up the pictures on the mat. After you print, you might want to laminate to make them last longer.
Next, find a bin. This one from Amazon is my favorite!
After you find a bin, then find a filler that is good for your child. You need to consider their age and ability as you pick a filler. A younger child will either need something that isn’t too small or will need complete supervision. You can also use some edible fillers such as flour mixed with oil or cooked noodles. Safety Statement: You need to provide supervision at all times for your child so that they do not eat the filler or cards or cause harm to themselves or others.
Once you have a bin and filled it, I would cover their play area with something so that they don’t make too big of a mess. Messes are part of the fun of sensory bins, but sometimes they can get out of control. We always do sensory bins on an old table cloth or towels to make clean up a bit easier. Then hid all the cards in the bin. This can be done based on ability. For my 4 year old, I would stuff them really far into the filler, but for my 2 year old I would leave them poking out some. This would make it easier for him to find the cards and less frustrated.
Finally, let them go at it! As they find a card, tell them what card they found and ask them to match it on the mat. They might not do great, but the more they practice the better. It is about exposing the child to the alphabet letter names and letter sounds.

Alphabet Sensory Mat Bundle A-Z
This is a digital file with 26 mats and 26 cut out pages to create an alphabet sensory bin for your child.
Learning extensions for the Alphabet Sensory Bin
So what are some other things you can do with the Alphabet Sensory Bin:
- Say the name of the item as they find it and match it (the names are given on the mat if it is hard to tell)
- Repeat the name and emphasize the letter sound. This is the beginning sound except for X.
- Have your child tell you the letter name.
- Have your child tell you the letter sound.
- Have your child tell you the items they found.
- Find other objects in your house to add to the sensory bin that start with that sound.
- Put two different letters in at a time and have your child sort the cards into the right letter.
- For a younger child, you can use this as a busy binder activity and not use the sensory bin.
- For an older child, you can hide the items around the room instead of a sensory bin.
- Have your child hide a certain picture by telling them which one to hide to build their vocabulary.
- Hide all of the cards for a letter and have them find only one card at a time by telling them which one to find.
- An older child can write or trace the word onto another piece of paper to practice writing and spelling skills.
- Have an older child try and think of other words that start with that letter and have them draw a picture to hide or write/trace the word on another piece of paper.
- Have your child trace the letter into the sensory bin filler next to the cards. They can trace it as many times in the filler as they would like or one for each card.
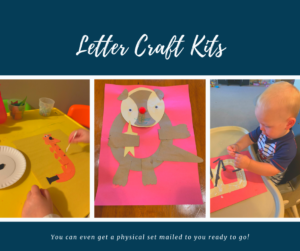
Another great extension is to use my Letter Crafts that match these mats! They are ready to go for your cutting machine or just print straight to construction paper. Check them out below.