This post contains affiliate links please see the Disclosure and Privacy Policy page for full disclosures here.
Having your child make animal alphabet crafts is one of the simplest to expose your child to the alphabet and letter sounds. They are very easy to cut using your cutting machine or even just printing on construction paper.
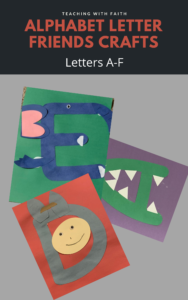
What is an Alphabet Letter Craft?
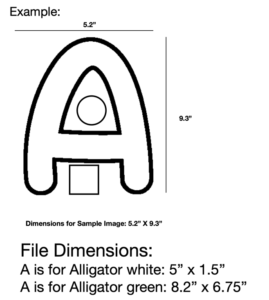
These are easy crafts that use the shape of the letter to make an animal. There is one animal per letter. Each craft has the letter as a base with extra pieces to make the animal. These pieces can be loaded directly into your cutting machine program. There are dimensions given to resize each shape in the program so that the craft will be the size of a piece of construction paper. On the dimensions it will let you know what color paper you need for each part along with the overall dimensions for that part. Each file is labeled by color so that it is super easy to figure out the different parts.
Some of the crafts use extra items such as paint, pom poms, and googly eyes. These all add extra experiences for your child as they work with their craft. My kids favorite part is adding the eyes!!
BUT I don’t have a cutting machine??
Well the good news is that you can print directly onto construction paper and cut them out yourself. You might need to trim up your paper a bit to make it fit into your printer, unless you have a “fancy” printer that can take bigger pages!! Once it is printed, just cut on the black line! I even made it so that black images would print onto white paper and be filled in already. No need to try and see the line on black paper.
How can my child personalize their animal alphabet crafts??
I have given you paper color suggestions, but you are welcome to let your child pick what color they want. If they want a pink horse, then print it or cut it on pink paper. If they want a purple narwhal then let them! I made it as easy for you and your family as possible. It is meant to be a fun project for your child to create on their own.
Learning extensions for the Animal Alphabet Letter Crafts
- Say the name of the animal as your child is creating.
- Repeat the name and emphasize the letter sound. This is the beginning sound except for X.
- Have your child tell you the letter name.
- Have your child tell you the letter sound.
- Have your child tell you other animals or items that start with the same letter.
- Have your child draw another picture of an item that starts with the same letter to build their vocabulary.
- An older child can write or trace the animal name onto the bottom of their picture to practice writing and spelling skills.
- Create a book of all the animals you have made so far and have your child flip through and tell you the animal and letter name and sound.
- Another great extension is to use my Alphabet Sensory Bin Mats that match these crafts!

Letter Crafts Bundle A-Z
This is a digital file to create your own Letter Crafts for the whole alphabet. These files are ready to use. This is a zip file with folders for each craft.